Friday 18 March 2016

Final Piece


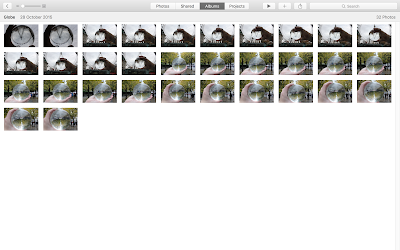
This is my final piece for Unit 3 and my chosen subject of Surrealism. For this piece I chose to combine two techniques that I think have worked quite well throughout this unit and those are cyanotypes and, my own section, life through a globe. As a trial leading up to this final piece I experimented with two different ways of creating the cyanotype, on the left I inverted the image in photoshop after the cyanotype had been printed and on the right inverting the image before the cyanotype was printed. 

But after experimenting with these two different ways of creating cyanotypes I couldn't decide on which works better for the surreal aspect of the unit so I decided to divide the image up and have a different technique on each side. The cyanotype given this image is surrealist feel because it's not something that you would typically be seen using to create a final image. Also having the globe in the centre flipping everything that can be seen through it creates a whole new world within the picture and by changing the levels, saturation and hue of the image I was able to define that lighter and darker tones of image more and also giving it more of a surreal feel to it. No specific photographers have inspired me to create this image I was able to find inspiration for it everywhere on the internet for example Pinterest, Tumblr and just simply looking on google images and this has helped me to create my own style for this final piece.

Contact Sheets


Tuesday 15 March 2016

Experiment 3 - Cyanotype Phase II


Here is the same image as my first attempt but for this cyanotype I inverted the image before printing onto the acetate as when exposed to light the cyanotype will look normal and I won't have to invert it after scanning it into the computer.


Here is my edited version where I have changed levels and saturation so that the tones and shapes are more visible. You can see the difference as before you could only real make out some of the shapes. Also the image looked extremely over-exposed and was really which contributed not being able to make out some of the shapes.


Here are the two cyanotypes that I have created, on the left the cyanotype has created by printing the image inverted and allowed the image to be created normally. On the right the image was printed normally and then inverted using photoshop and this is the effect it was given. After using this experiment I have chosen to incorporate cyanotypes into my final piece but after seeing my two side by side I am undecided on with technique to use as the left looks more like a cyanotype as the solution has stayed cyan but I like the effect that was given to the one on the right as it gives it a vintage look and personally I think it looks better but doesn't look like a cyanotype as it has been inverted and lost it's colour. 


Tuesday 8 March 2016

Experiment 3 - Cyanotypes Phase I

Here I have experimented with the Cyanotype technique. This process included covering a piece of normal paper in a light sensitive solution and then covering the paper with a image that has been printed onto a piece of acetate. Next you have to expose the paper to a light source so the image can transfer. By printing your image onto acetate it allows the light to pass through the lighter areas of the image on to the paper with the solution therefore creating a cyanotype.


After scanning in the final image I then put it into photoshop and inverted the colours so that the image was in it's original state before being turned into a cyanotype. After inverting the image the background has also changed colour to a brown and black and this defeats the objective of being cyanotype as the background is no longer cyan. I will try this technique again but instead of inverting the image after the cyanotype is created I will invert the image before printing onto acetate ands if that gives the same effect as this way.


I then decide to edit the image a bit further by changing levels, saturation etc. so that the shapes and light and darker areas were more visible and brightened the image so that it wasn't as faint as it was in the image above.


After experimenting with this unique style of photography I think I'm definitely going to try and incorporate this technique into another aspect of this unit as it is a really effective way of displaying your images. This links into Truth, Fantasy and Fiction as it has a surreal feel to it.

Thursday 7 January 2016

Experiment No.2 - The Eye


To create this image I have used inspiration from the artist M.C. Escher. One of his drawings that he created was of an eye reflecting a skull within it and has a surreal feel about it and I have tried to emulate that with this photo. 

By using the same style I have been able to create this image and also I have been able to keep to the theme of surrealism. I have done this by using a black and white layer for the the eye and the facial area surrounding it. Also by changing the levels and saturation it has given the eye more life as it has highlighted areas that looked dull. By using the burn tool I have also been able to dark and highlight areas which I think should be standing out more than they originally were. You can see this in affect around the edge of the eye itself and also just above the eyelashes.

I then added the next layer which is my image of Big Ben and the Underground sign. I decided to keep this in colour as I thought it made it stand out more and gives it a focal point as the second you look at it you are led straight to that image and not around it. I changed the opacity to around 30% as it needed to look as if it was a reflection within the eye and not just a solid image placed on top.

Planning Sketch


Photoshop Screenshots 

 This screenshot is me using the burn tool to highlight the darker areas around the eye.


This screenshot shows me adding a black and white layer to the eye and the the highlights of the burn tool start to show more.
 I then added the image of Big Ben and the Underground sign, re-shaped to fit in the eye and changed the opacity to make it look like a reflection.


Finally, I adjusted the hue/saturation and levels to finalise the look of my final image.
Final Image


Tuesday 15 December 2015

Experiment No.1 - Phase II


I have created a video on the final product for my 'Digital Pinhole Camera'. This video includes what the body cap looks like on the camera, what it looked like before it was made into a pinhole and the body cap off of the camera. This experiment took roughly 30 minutes to create as I did have to drill a hole in the cap. After that the rest was simple. If I was to do this again I would experiment by putting your camera in strange locations, such as really close to a foreground object and by using a pinhole you can have almost a unlimited depth of field!

Planning Sketch


Here are some of the photos I have taken using my Digital Pinhole:


Contact Sheet


Experiment No.1 - Phase I


Digital Pinhole Camera

For my first experiment I chose to create a digital pin hole camera. The digital pin hole camera is made by putting a hole through a body cap and the attaching this ti the body of your digital camera and you can the create you images. As there is no lens attached to the camera body it means that you can't control focuser zoom. The only thing you have control on the camera is when you close the shutter and whether you use he flash or not. The measly amount of light a pinhole lets through makes it very hard to see through the viewfinder. On a bright, sunny day you can expect a good photograph by setting a one-second exposure at ISO100. Around dawn and sunset it may be hard to capture enough light in 30 seconds so you need to have a or sturdy surface to keep the camera steady and get the best quality photo. Since you can’t focus a pinhole, even the clearest image you create with one can never be described as crisp. Everything is equally in focus or even out of focus from right in front of the pinhole to the distant horizon. 


Here are a few example of a digital pinhole photos:


Friday 13 November 2015

Analogue Photoshoot


After using and creating my digital pinhole to create the same effect as a film camera I decided to compare the difference in quality of images with the digital pinhole and my Praktica film camera. The image below was a image that was captured with my film camera and a problem occurred here that is very common with film cameras and it's that the image is underexposed and to make sure no images are underexposed or over exposed takes time and practise to understand the light balance and which shutter speed to use. Another problem I found with this image and actually with all of my images is that there is green streaks through the images and this annoyed me cause majority of my images on the negatives would have looked fine and usable without the green streak.


Here are a few images that didn't work and still have a surreal look to them as there a bit's missing or not fully developed.


Contact Sheet